Different Shapes of Nails

Your natural nails are a thing of the past, as are with the shape of them. With so many customizaeable options to choose from, it can be a little overwhelming when the nail technician asks: “so, what shape are we going with this time?”

Luckily, we’ve put together this handy guide to help you make a decision so you’re prepared to answer that tough question at your next nail appointment. Here are the 8 most common nail shapes that you can get at the nail salon.

1. Square Nails

If this shape sounds super straightforward, it’s because it is. Square nails are, well, square, meaning they’re flat on the top with straight, sharp corners. No flaring or tapering involved, and they can be achieved with your regular nails as well, no acrylics required!

2. Round Nails

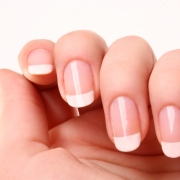
This classic shape is perfect for those who like to keep their nails short and don’t have a flair for the dramatics as this shape closely mirrors your natural nail shape. How round you want to take them is up to you.

3. Squoval Nails

A combination of both the square and the oval, this nail shape is perfect for those who want the look of a square nail, but are put off by the harsh corners, Squoval nails are flat on top like the square, but are filed down around the edges to give a more smooth appearance.

4. Oval Nails

You may think that round and oval nails are the same thing, but they’re not. In addition to filing around the edges like a round nail, oval nails are more tapered near the top, giving the fingers a more slender appearance. This nail shapes is most popular with those who have shorter fingers.

5. Stiletto Nails

Drama, drama, drama. If you’re all about theatrics, stiletto nails will definitely get you noticed. Like almond nails, they taper towards the top, but rather than the smooth, delicate ends of the oval and almond, stiletto nails end in a sharp point. Be careful when taking care of that itch on your face!

6. Ballerina Nails

You may recognize this shape from none other than Kylie Jenner as this is usually her go-to. Ballerina nails are shaped like stilettos, but rather than ending in a sharp point, they are cut straight across like a square.

7. Flare Nails

Also called the duck bill shape, this unique nail flares up and out to give a more wider shape. This nail shape is perfect for those who want nail art, as there is a much larger surface area to work on.

8. Mountain Peak Nails

A favourite of celebrity, Lady Gaga, this is another variation of the stiletto nail. It still ends in a point, but it is much shorter.

If you are still undecided on your next nail shape, take to Pinterest or Instagram! Both of these social media platforms are filled with inspiration for your next look.

Also, don’t forget to use Plei Nail Strengthener with and without your acrylics and gel extensions for strong, healthy, nails.

How to Remove Acrylic Nails at Home

Acrylic nails are beautiful and will make you stand out in a crowd, much more than just painting your nails at home. With the many shapes and lengths that you can customize to your liking and preference, they’re a must-have when getting ready for an event. However, though acrylics are beautiful, they’re a little tricky to remove once they’ve reached the end of their lifespan, and some nail salons will charge you an arm and a leg to remove them. Luckily, there are a few ways that you can remove acrylics from the comforts of your home using supplies you already have stored around the house.

Removing Acrylic Nails Using Nail Polish

Supplies Needed:

  • Nail polish remover
  • Tweezer
  • Bowl
  • Nail Clippers

The Process

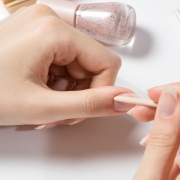
  1. Trim or files down the acrylic as short as possible.
  2. Wedge your tweezers around the edge of the acrylic and gently pry upwards.
  3. Pour a generous amount of nail polish remover into a small bowl.
  4. Soak your acrylics in the nail polish remover for 30-45min.
  5. After 30min, check to see if the acrylics have loosened and gently pry them off with the tweezers. If the acrylics do not come off easily, soak for more time until they do.

Removing Acrylic Nails Using Dental Floss

This one unfortunately you cannot do by yourself, so have a partner or a family member handy to help you out. Keep in mind as well that this method can be a little painful depending on your pain threshold, so for those who aren’t so great with pain, opt out of this method.

Supplies Needed:

  • Tweezers
  • Floss
  • Another person

The Process

  1. Using the tweezers, make an inlet at the base of the acrylic for the dental floss to be inserted into.
  2. Have your partner slide the floss into the inlet and begin a sawing motion as they work down the nail. The acrylic should pop off once you get far enough.

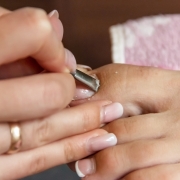
Removing Acrylic Nails Using a Credit Card

Supplies Needed:

  • Credit card or another laminated card
  • Tweezers

The Process

  1. Use the tweezers to pry up the edges of the acrylic at the base, creating an inlet.
  2. Slide the laminated card into the inlet and gently pry upwards, working your way down the nail. Like with the floss, the nail should pop right off once it reaches a certain point.

This list is by no means exhaustive and there are many other ways to remove your acrylic nails by using other supplies such as acetone. However, for simplicity, this list only contains methods that use common household items without having to go out and buy anything. Do your research and find out which method is safest and most comfortable for you.

Cuticle Oil: Benefits and Uses

Before any good manicure, it’s important to first treat the nail and surrounding area for a clean application, result, and of course, to make you feel pampered and pretty once you leave the salon. Cuticle oil can now be found in most drugstore and beauty stores, so even if you do a polish application at home, adding cuticle oil to your routine will enhance the experience.

So, what is cuticle oil?

Like the name of it, cuticle oil is an oil that is used to moisturize your nails and cuticles, making them soft and silky feeling. The base ingredient is most commonly some kind of vegetable oil, then strengthened with vitamins and citric acid.

The purpose of cuticle oil is to repair dryness and damage that has been done to the cuticles through things like chlorine, extreme cold, the sun, and salty water. These things can make your cuticles dry, chapped, or even crack, causing them to bleed. Cuticle oil can repair these damages and restore your nail and cuticle back to good health.

Cuticle oil is also used to stimulate nail growth by improving the circulation around the nail bed. Not to mention, it leaves a lasting shine that improves the look of dullness, and brings attention to your freshly done nails.

Cuticle oil is very easy to use. Because it is an oil, you’ll only need a small amount to get the desired effect. Simply dab the product onto your cuticle using a cotton ball, or a brush if your cuticle oil comes with an applicator. Apply only a few drops to each fingernail, then massage gently into the cuticles to improve absorption and to maximize the surface area treated. Allow the product to absorb into the cuticle and do not wipe or wash off.

Use cuticle oil every time you do your nails for healthy cuticles that shine!

Which Nail Should be The Accent Nail?

Accent nails are a perfect way to spruce up your at-home manicure without having to worry about paying a hefty price tag for some complicated nail art. If you’re an aspiring nail technician, accent nails are a perfect place to start, especially since they can be so versatile! Maybe you want a bit of shimmer, or just a complimentary shade that makes your nails stand out among the rest. The possibilities are endless!

Your options don’t just end at colours, though. The next step is figuring out which nail you want to accent. In pop culture, different fingers can mean different things, but whether or not you choose to listen to this is up to you. Any nail can be your accent nail!

Pinky Finger

Elegant and feminine, this accent nail is also called the party finger, making it a popular sparkly polish accent finger.

Ring Finger

Arguably the most common and popular destination of the accent nail. For single ladies, adding a splash of colour to your ring finger means that you are single, drawing attention to your ringless finger. On the other hand, a bride to be may choose to add some sparkly charm to her ring finger to showcase her engagement or wedding ring.

Middle Finger

Ooh, now this one could be interesting. If you’re into symmetry, the middle finger is perfect for you since there are two fingers on each side of the accent nail, making it look proportionate and professional. With your middle finger typically being the longest out of all your fingers, it is sure to stand out no matter what colour you choose.

Index Finger

Another rare, but interesting choice. Your index finger is arguably one of your most used, individually speaking. If your job involves a lot of pointing and advertising, this nail may be a good choice for you to make as your accent nail.

Thumb

Even more rare than the index finger is the thumb. Very rarely is the thumb used as a solid colour accent nail, and is moreso used for nail art since it provides a wide canvas for ease of design. That shouldn’t deter you from being bold and making a statement though!

What is your go-to accent finger?

How to Stop Biting Your Nails

Nail biting is usually described as being just a bad habit, but sometimes it can be a side effect of stress, anxiety, or something that we do subconsciously while doing things like watching TV or reading a book. However, nail biting is not healthy and can cause more than just cosmetic issues with your nails. Your fingernails are one of the dirtiest places on your body and biting your nails can transfer bacteria from your nails and into your body, resulting in sickness and even infections.

Luckily, there are ways to help you stop biting your nails. Listed below are a few tips and tricks that you can try out to see which one works best for you.

Keep your nails trimmed short:With less nail to bite, the less you’ll be tempted to bite them.

Apply Nail Polish or Artificial Nails: Having nail polish or artificial nails on your natural nails may actually be a deterrent as the nail polish will taste bitter, and the act of spending money to keep your nails looking beautiful will make you think twice before putting them in your mouth.

Keep Your Hands Busy: When reading a book or watching TV, opt for using a stress ball or fiddling with something to keep your hands occupied.

Identify The Problem: Find out what causes you to bite your nails in the first place. Is is stress? Anxiety? Are you bored? Are you uncomfortable with hangnails or having long nails? By figuring out what triggers you to bite your nails, you can take steps to avoid these situations, or make a plan to do something different when the feeling arises.

It may seem hard at first, but with persistence, you’ll be able to kick the habit in no time! Contact a dermatologist if problems arise with your skin as a result of biting your nails.

How do I Treat an Infected Nail?

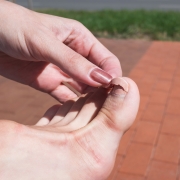
One of the most common hand injuries is an infected fingernail. Fingernail infections often occur on the edge of nail and are incredibly painful, but the majority of the time are not serious and do not require medical intervention by a doctor.

Fingernail infections can be caused in a number of ways. Ingrown nails or nail biting can cause the skin to break and allow bacteria to enter the area, often causing a fingernail infection. Getting your nails done at the salon and having your cuticles pushed down may also lead to a fingernail infection.

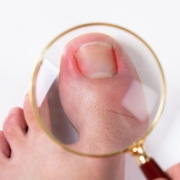
Fingernail infections are easy to spot so if you suspect that you have a fingernail infection, watch for these signs and symptoms:

  • Swelling around the fingernail
  • Redness and a tender feeling when pressed down on
  • Blisters or pus build-up (in worse cases)

Luckily, there are at home methods that you can use to treat fingernail infections without having to see the doctor. At home remedies include:

Antiseptic soaks

Using antibacterial and warm soap, soak the affected fingernail in a bowl 3 times a day for up to 20 minutes. If the infection has not cleared within four or five days, visit your doctor.

Draining

Most fingernail infections do not pus or will go away before it gets to that stage. Should your fingernail infection progress to a point where pus is present, give it a gentle squeeze to release the built-up pus. Pus will normally drain away on its own when you use the soaking method, but others are a bit more stubborn. Pricking the area with a sterile pin to help release the pus may be necessary.

Antibiotics

Over the counter remedies such as Polysporin have worked wonders for many different infections, and fingernail infections are no exception. Apply the cream after using the soaking method for best absorption and efficacy. Do this three times a day after each soaking and apply a band-aid to ensure the cream absorbs into the skin and does not run off on anything else. If the infection persists after 5 days, call your doctor

Top 4 Nail Trends for Spring 2019

TLike the seasons, trends come and go. Some are one-hit wonders that make their mark on the world for a week and then fizzle out, while others continuously stay at the front of the pack. While there are timeless classics that you can never go wrong with, here are the top four nail trends for Spring 2019 that will ensure that you stand out amongst the rest.

Crystals

Flashy nail art has always been a thing and it won’t be going anywhere anytime soon. Crystals will be the go-to nail accessory, whether it will only be on a statement finger or all of the nails. Although, unlike in the past where it was popular to pair crystals with clear or pale nails, this Spring is all about bolder colours paired with crystals of all shapes, sizes, and colours. Play around and see which gems compliment you the most.

Primary Colors

Ah, yes, the classics. Expect lots of reds, blues, and yellows to be making an appearance this Spring, and we’re not talking about the pastel variations or any other kind. Think more: crayola crayon style. Bright, bold, and beautiful.

Pearls

Ooooh, shiny. Much like the crystals, pearls of all different sizes will be a much desired nail accessory to everyone this Spring. For added shine and glamour, these pearls will be looking their best when placed on top of a nail polish that has a pearlescent finish to it. Icy blues, pearly pinks, and lavender are all expected to be a major hit.

Mix-and-match neutrals

Not into bejeweling your nails or fancying a pop of colour? Never fear, neutral tones are here, and always will be. Though a neutral tone may seem safe for less daring, many are spicing up the timeless classic by mixing and matching neutrals for a fun, quirky look. Whether it’s a different colour on each nail or doing something spunky like stripes or spots, your nails are sure to draw a lot of attention.

Taking Care of Your Acrylics

For those of us who dream of long nails, but are unable to grow and maintain them for various reasons, acrylics are our holy grail. They’re stunning, can come in many different shapes and sizes, and the best part is that they last a really long time. However, like with all things, in order to keep them a long time, they need to be tended to. Here are 3 ways that you can keep your acrylics looking beautiful and healthy for the weeks to come.

SCHEDULE ‘FILLS’

Because acrylics are placed on top of your nail, they also grow with your nail and a gap can be created between the bottom of the acrylic and your natural nail bed. This can cause it to not only look a little funny, but it also makes it a lot easier for the acrylic to become damaged or to break off. By keeping up with 2 week appointments, your nail technician can fill in the gaps and keep your nails looking fresh.

USE QUALITY NAIL POLISH AND A TOP COAT

Acrylics are an investment of their own, so why not splurge a little bit? Most nail salons that you go to will have standard nail polish, but we recommend going for the gel polish to put on top of your acrylics. Not only does it apply better, but it will last longer too. If not already offered, make sure you get the top coat applied as well for even shinier and longer lasting color.

MOISTURIZE YOUR HANDS

Moisturize! Moisturize! Moisturize! Keeping your hands soft is one thing, but the moisture will also help to keep your nails strong. It also prevents hangnails which a bonus. Apply nail oil to your cuticles as well for added softness.

Don’t forget! Plei Nail Strengthener can also be used with acrylics  so be sure to pick up a bottle before you go for your next appointment to the nail salon!

Manicure & Pedicure Safety

Spring is just around the corner, and with the arrival of Spring, comes warmer weather which means that hundreds of locals will be flocking to their nearest salon to get their nails prepped for the sun-filled-open-toed-shoe days. However, choosing a nail salon can be tricky business these days, which is why it is important to do your research carefully and be sure to choose a nail salon that is reputable and has proper safety procedures put in place. “Why?” you may ask? Well, let’s take a look at some of the risks of going to a nail salon.

One of the most common things to happen at a dodgy nail salon is getting an infection. Infections are commonly contracted from dirty tools that have either a) not been disinfected properly or b) haven’t been disinfected AT ALL. Gross. One small nick or cut and you are opening yourself to a plethora of illnesses and bacteria. Even recently shaved or waxed legs can pose a risk as tiny microorganisms can pass through the follicles and into your bloodstream.

If you think that sounds gross, you don’t even want to know what that bacteria can cause, but for the sake of your health, you deserve to know. Staph infections and mycobacteria infections are the frontrunners in a dirty nail salon, as well as various fungal infections. A quick Google Image search of any of these will be enough to urge you to take the proper precautions and choose a reputable nail salon for your next manicure and pedicure.

It’s easy to tell a clean nail salon from a dirty nail salon just by walking in the doors. If you see that the place is dirty or unkempt, or that a nail technician happens to drop a spa tool on the floor and reuse it, it’s a good indicator that this is not the place to go. Get out of there as soon as possible.

Enough of the bad stuff, though. Let’s talk about what makes a nail salon a GOOD nail salon.

There are three levels of decontamination, and if your nail salon hits the third one, then you’ve hit the jackpot. The three levels consist of sanitation, disinfection, and sterilization. Most salons will at least hit the disinfection stage if they’re not using single-use tools. For proper disinfection, salons will use an EPA registered product that is a bactericidal, fungicidal, and virucidal all mixed into one. Tools should be soaked in this product for at least 10 minutes to get the full effect and ready for use on the next client.

Speaking of tools, the tools themselves should be in top condition, free of rust and any other deformities. Buffers and files should be new and never reused on any other clients. Similarly, pumice stones cannot be disinfected, so if it is not a new one, decline the service, or bring your own from home.

If you have any doubts, feel free to ask the salon upfront before your appointment. If they can’t give you an exact answer on how they disinfect their tools or how they go about it, it is time to find a new nail salon.

This article was not meant to completely deter you from getting your mani and pedi, but rather to remind you to make smart, healthy choices. Even if it means paying a little more, you can never put a price on your health.

Top 5 Vitamins That Support Nail Growth

Did you know that your nails are actually a good indicator of your health and help you realize what nutrients you may be lacking in your diet? Like the rest of your body, your nails need certain nutrients to thrive and stay strong and healthy. Today, we’re going to look at the top five vitamins that support nail growth.

1. Biotin (B7)

Biotin has taken the supplement aisle and social media by storm with celebrities promoting various brands, claiming that their nails and hair have never looked better thanks to biotin supplements. Biotin is part of the B Vitamin group, known short-handedly as B7 and sometimes vitamin H and helps to promote healthy cell growth as well as the metabolism of amino acids. While it is extremely unlikely that you should be suffering from a biotin deficiency, there are supported studies that show that an extra supplement can aid those with brittle nails.

If you’re looking for a natural way to consume the vitamin, rather than through a pill or gummy, try these foods which are rich with the vitamin: liver, egg yolk, dairy products, yeast, salmon, avocado, sweet potato, seeds, and cauliflower.

2. Folate (B9)

Folate works similarly like Biotin in the fact that it aids in the development of new cells and red blood cell formation and production. Folate also plays a role in carrying oxygen to the nail cells. Again, while a deficiency in this vitamin is not common, your nails can be an indicator on whether or not you need more folate in your diet. A deficiency in folate causes a pigment change in your nails, making them appear darker, as well as causing them to become for fragile and brittle.

Folate supplements can be found in any grocery store, but are also commonly found in plant-based foods such as dark green vegetables, citrus fruits, beans, peas, lentils, nuts, seeds and avocado. Folate can also be found in poultry, fish, eggs and dairy.

3. Magnesium

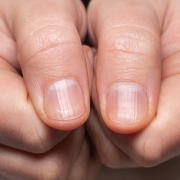
Magnesium is important for most of our body’s functions, not just our nails, as it is involved in the process of nail growth by performing protein synthesis. A deficiency in magnesium will cause vertical ridges on the tops of your nails and slower nail growth. If a nail has fallen off or been broken, an increase in magnesium will help speed up the growth as it aids in the formation of new nails.

Magnesium is relatively easy to come by and even easier to add to your diet. Magnesium can be found in whole grains, especially whole wheat products, dark green leafy vegetables, as well as quinoa, almonds, cashews, peanuts, edamame and black beans.

4. Protein

If you’re a biology or a nail guru, you probably know that your nails are made of a substance named keratin, but what you may not know is that the keratin that makes up your nails is actually dead and constantly sheds as new nail growth happens. In order for keratin production to continue creating strong nails, you need an adequate amount of protein in your diet. Low amounts can cause weaker nails.

Protein is one of the more common nutrients to come by and easily added to your diet, no matter if you’re vegan or an omnivore. The nutrient can be found in animal foods like meat, poultry, fish, eggs and dairy, as well as plant foods, such as soy, legumes, beans, lentils, nuts, seeds and whole grains.

5. Omega-3 Fatty Acids

Ever wonder how your nails can have a natural glow or shine to them. Omega-3 Fatty Acids are the key as they’re responsible for lubricating and moisturizing your nails to give them a healthy glow. Omege-3 fatty acids also help nourish the nail bed which in turn promotes the health of the cells underneath the nail itself. A deficiency in this nutrient causes dry and even brittle nails.

Omega-3 fatty acids can be comsumed as a supplement, but most of them have a fishy aftertaste, so most people prefer to get them from their food. Omega-3 fatty acids are commonly found in products such as: salmon, trout, mackerel, tuna and sardines, but for those who prefer to have a fish-less diet, they can also be found in walnuts, soy, eggs, chia seeds, and flaxseeds.

Talk with your doctor if you suspect that you have a deficiency in any nutrients. As mentioned above, your nails can be an excellent indicator of your health and can help point you in the right direction.

For aid in your brittle nails, use Plei Nail Strengthener as part of your daily routine to nourish your nails and promote healthy nail growth and strength.